|
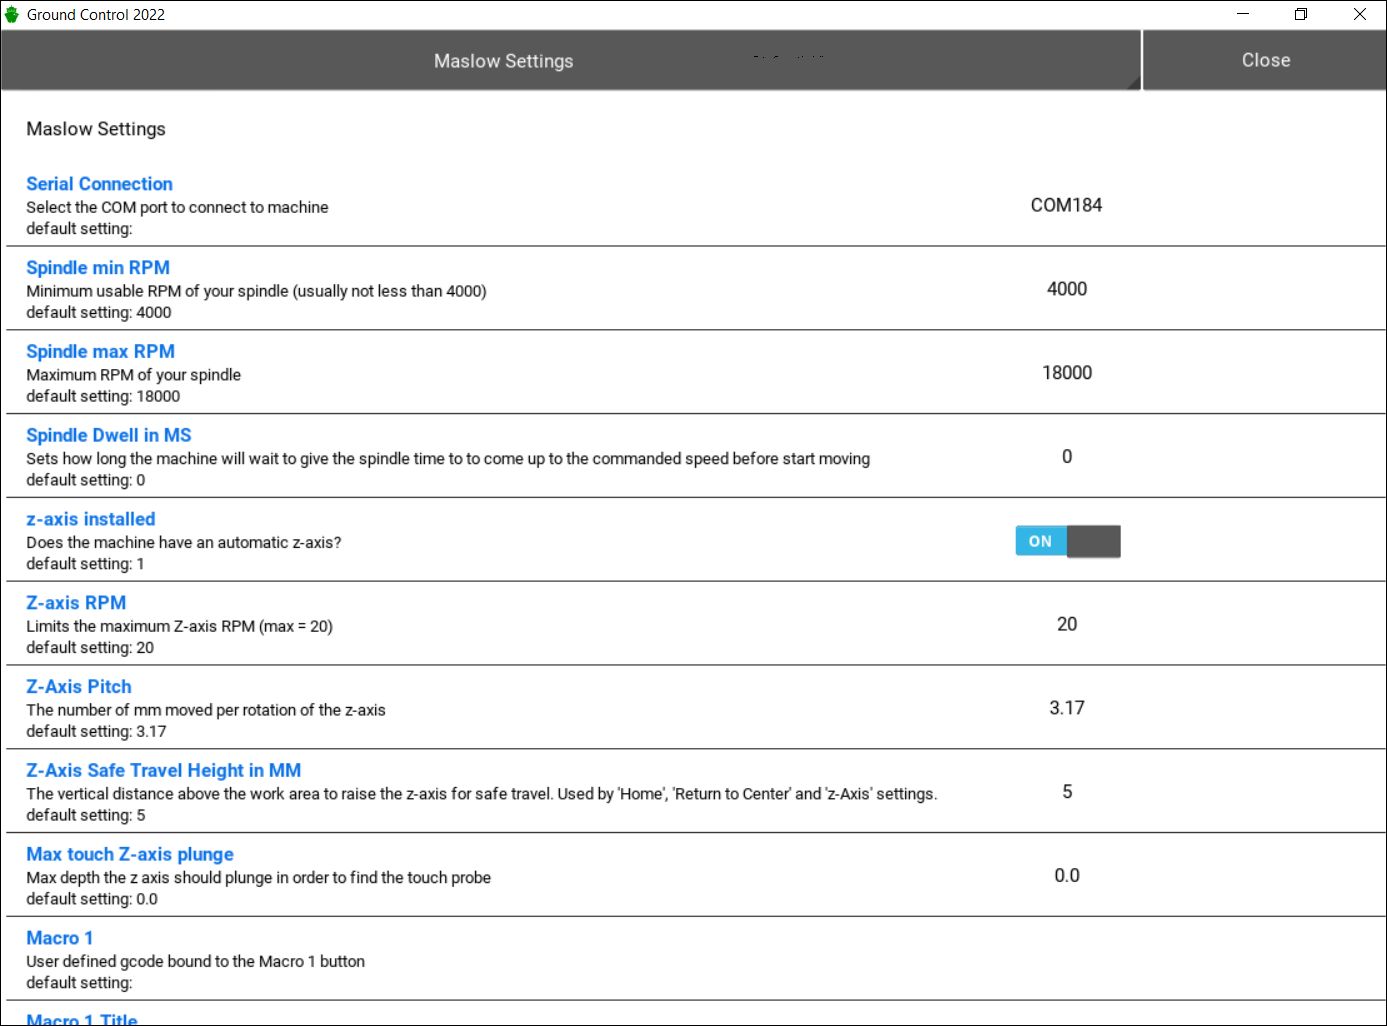
Ground Control 2022 is the newest and upgraded version of the original Maslow cnc software, it runs on your computer and connects to the machine. It's easy to install and simple to use.
New features:
- Easier and more accurate calibration
- 45% overall faster cuts than previous versions (40% faster X,Y - 60% faster Z-axis)
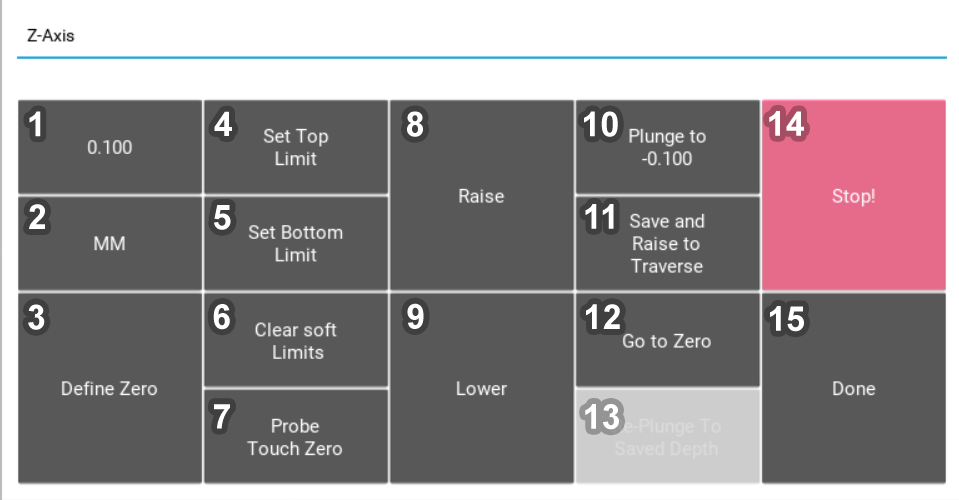
- Soft Z-axis limits
- Spindle speed control via S-commands
- Ability to send G-code commands manually and on the fly.
- One click installation.
- Compatible with Windows - Mac - Linux - Pi
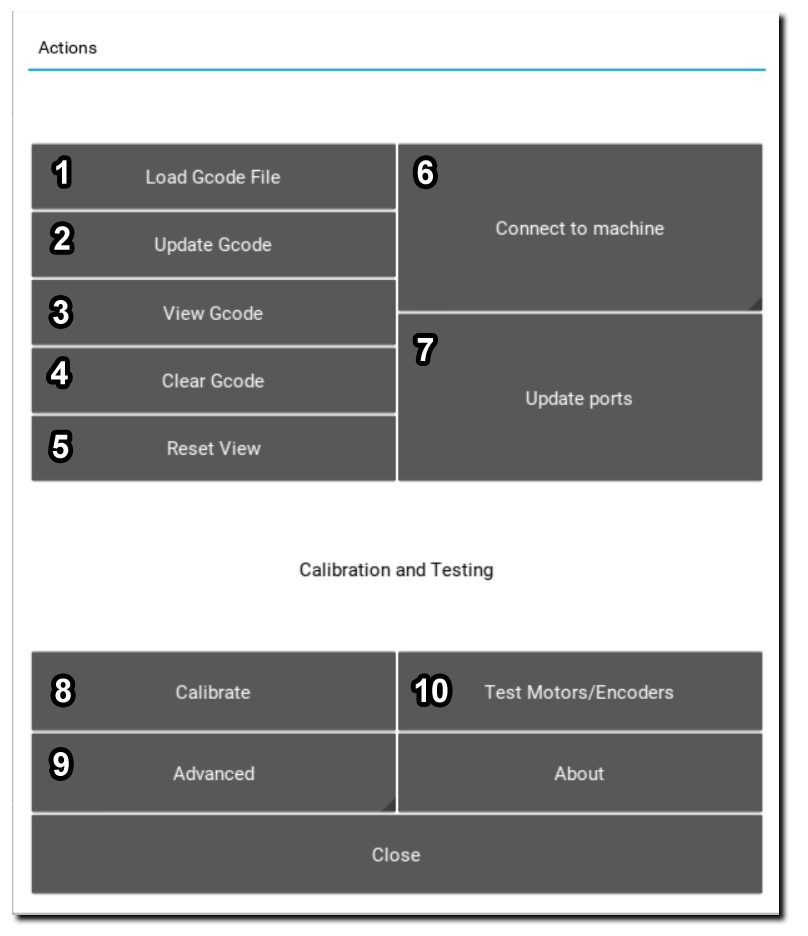
Main functionalities:
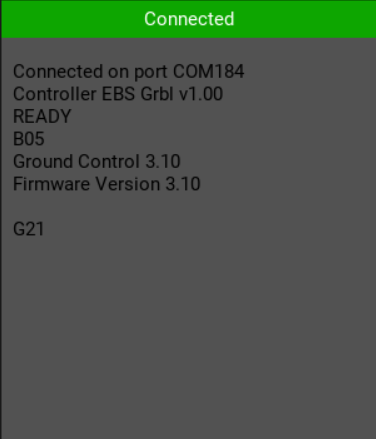
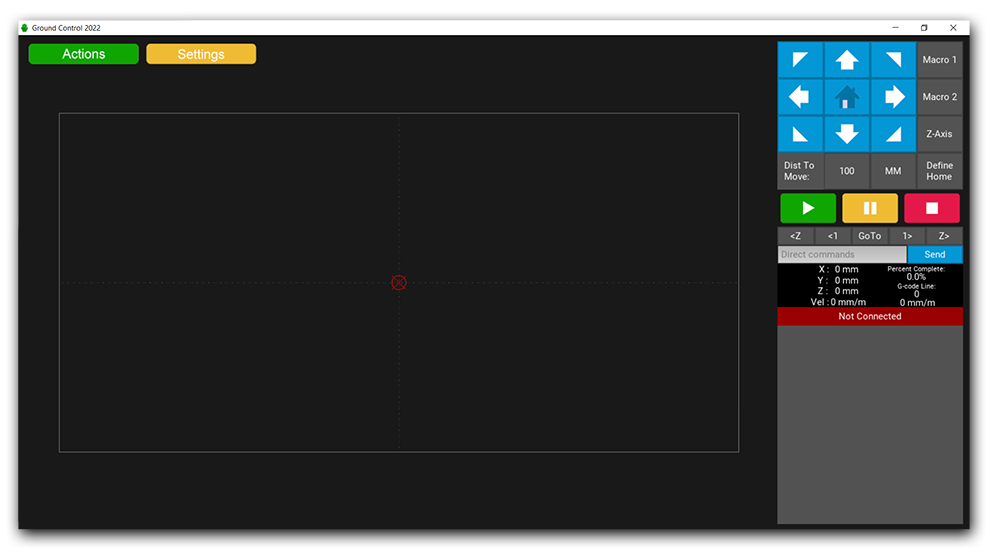
- Connect to the machine
- Proper and Accurate Machine Calibration
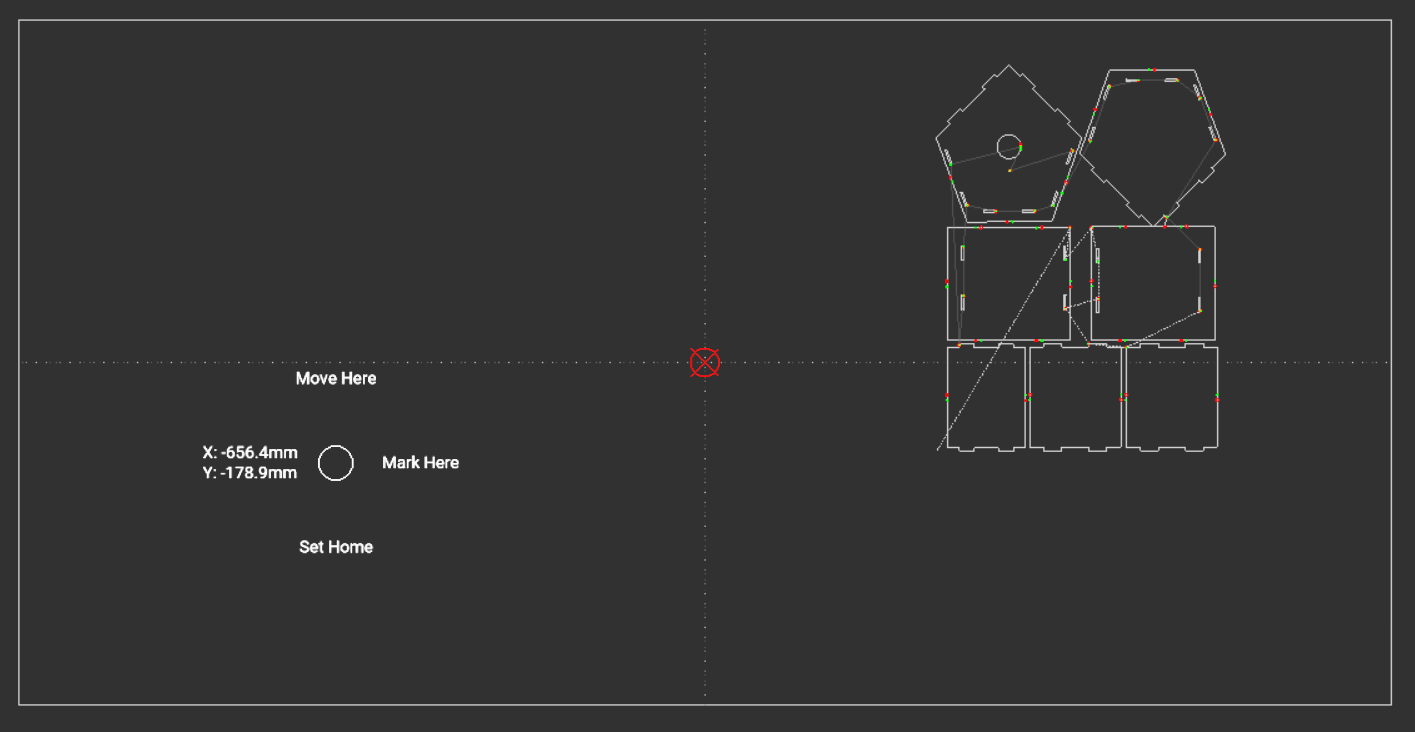
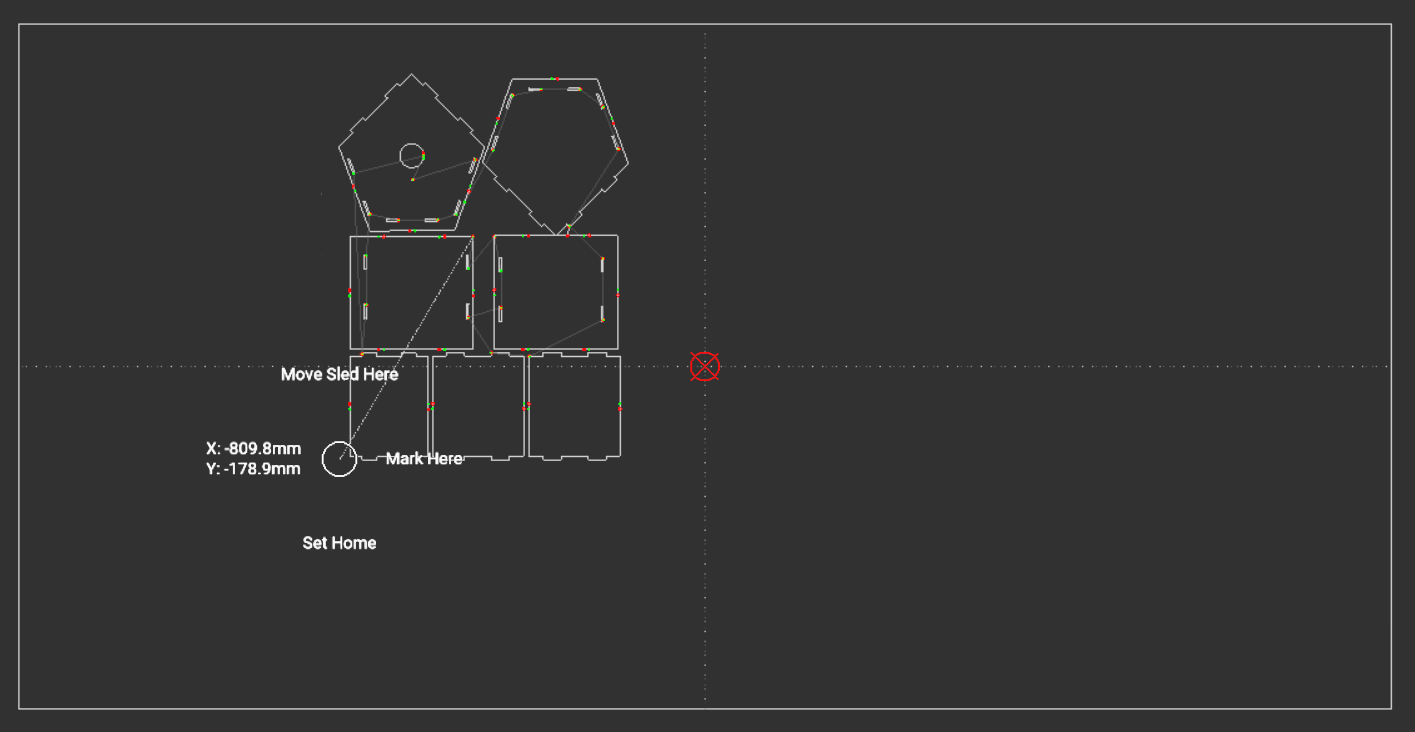
- Load and position projects on the working area
- Send G-code commands to the machine
- Start, Pause or Stop a job
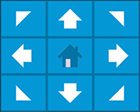
- Jog the router manually if needed
- Test the system
|
 -->
-->  --> and select the correct port
 --> and select the project file from your computer