- Building The Frame
- Installing the software
- Temporary sled
- Assembly and Calibration
- Making The Final Sled
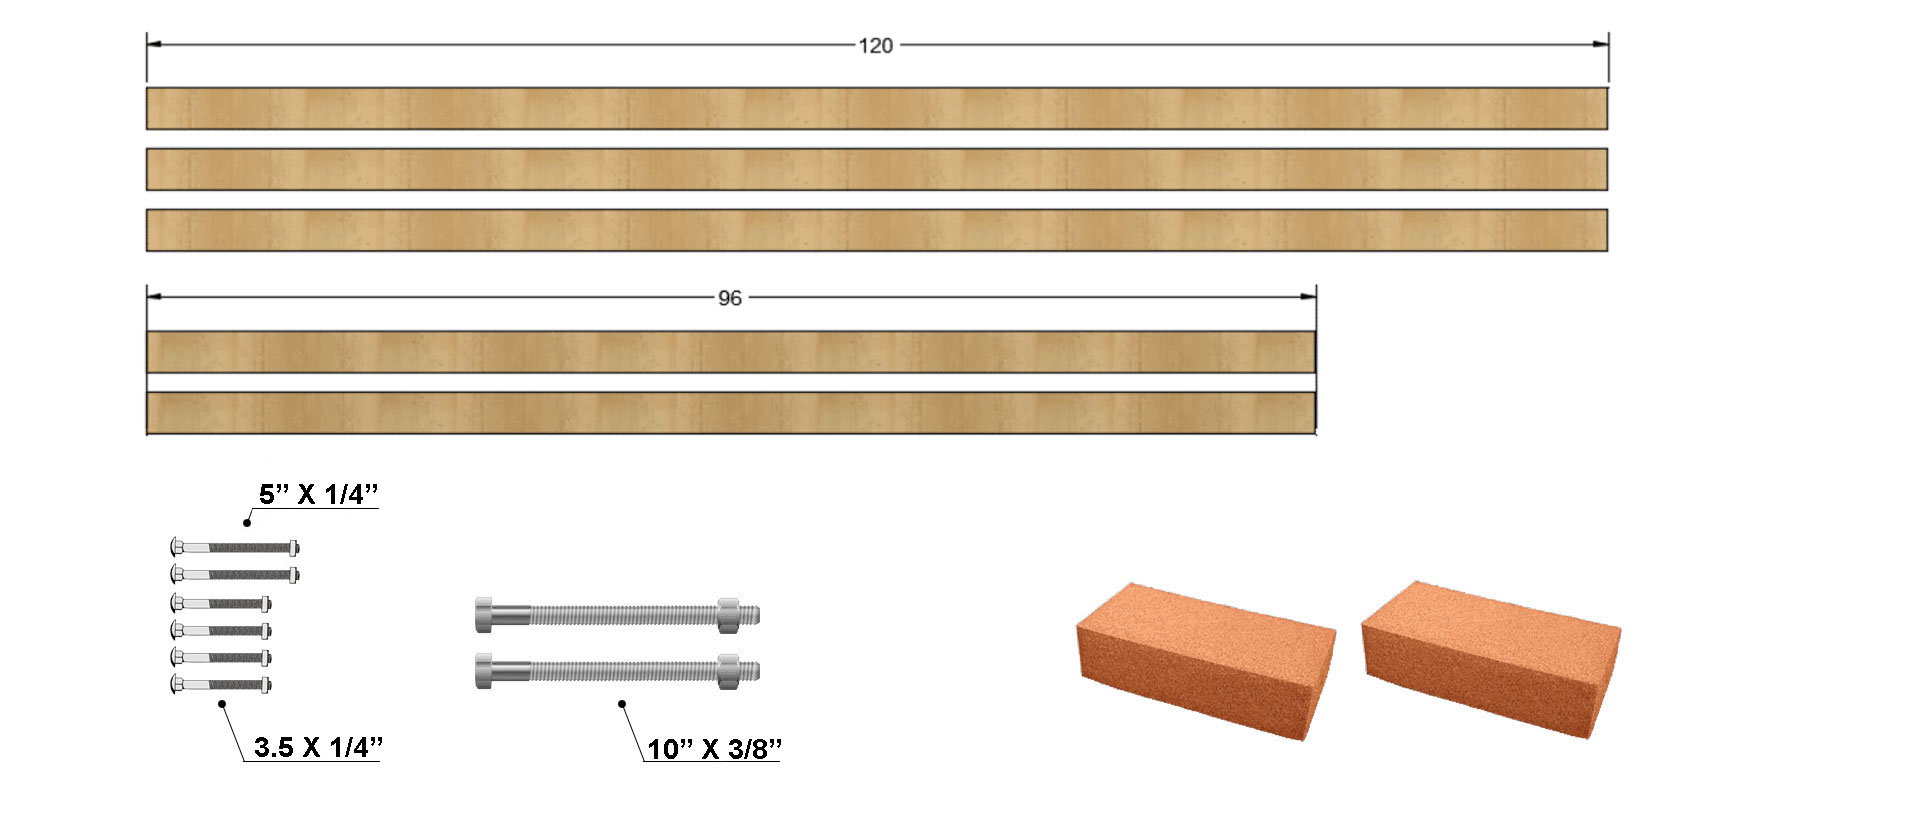
Bill of Materials
- (3) 2x4s 10 feet long
- (2) 2x4s 8 feet long
- (2) 4'x8' x 3/4" Plywood sheets.
- (2) Bricks
- (2) 3/8 in x 10 in hex bolts with with washers and nuts
- (2) 1/4 in x 5 in carriage bolts with with washers and nuts
- (4) 1/4 in x 3.5 in carriage bolts with washers and nuts
International users. 2x4 (two by four) is a common reference for wooden boards in the US. However, 2x4 is nominal size, the actual measurements are 1.5 in x 3.5 in.
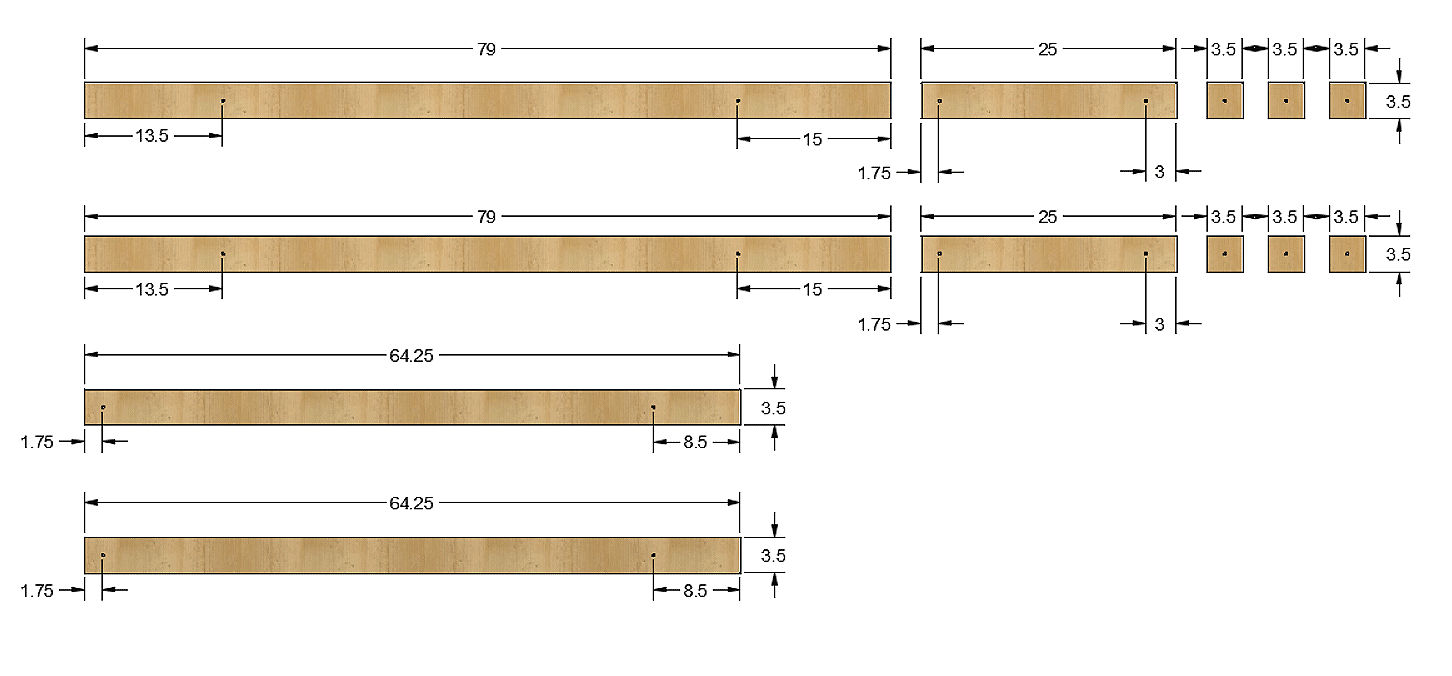
Cutting and drilling the holes
- Cut (2) 10-feet and (2) 8-feet long boards as illustrated below
- Use 1/4" drill bit for the holes
All measurements are in inches and referenced from the end of the parts to the center of the hole.
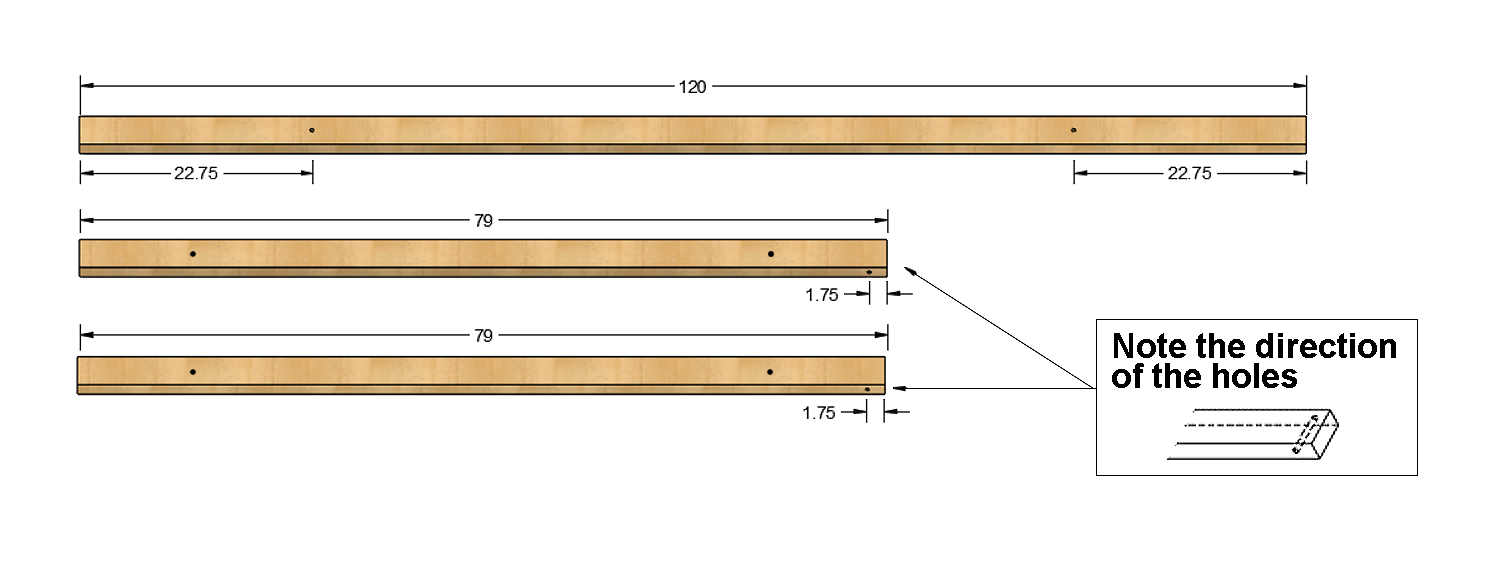
- Take the uncut 10ft board and drill two 3/8 holes as illustrated below.
- Drill two more 3/8" holes in the two 79in boards (previously cut and drilled) as illustrated below.
Bolt together the legs
- Use (2) 1/4in x 5in carriage bolts for joint C
- Use (4) 1/4in x 3.5in carriage bolts for joint A & B
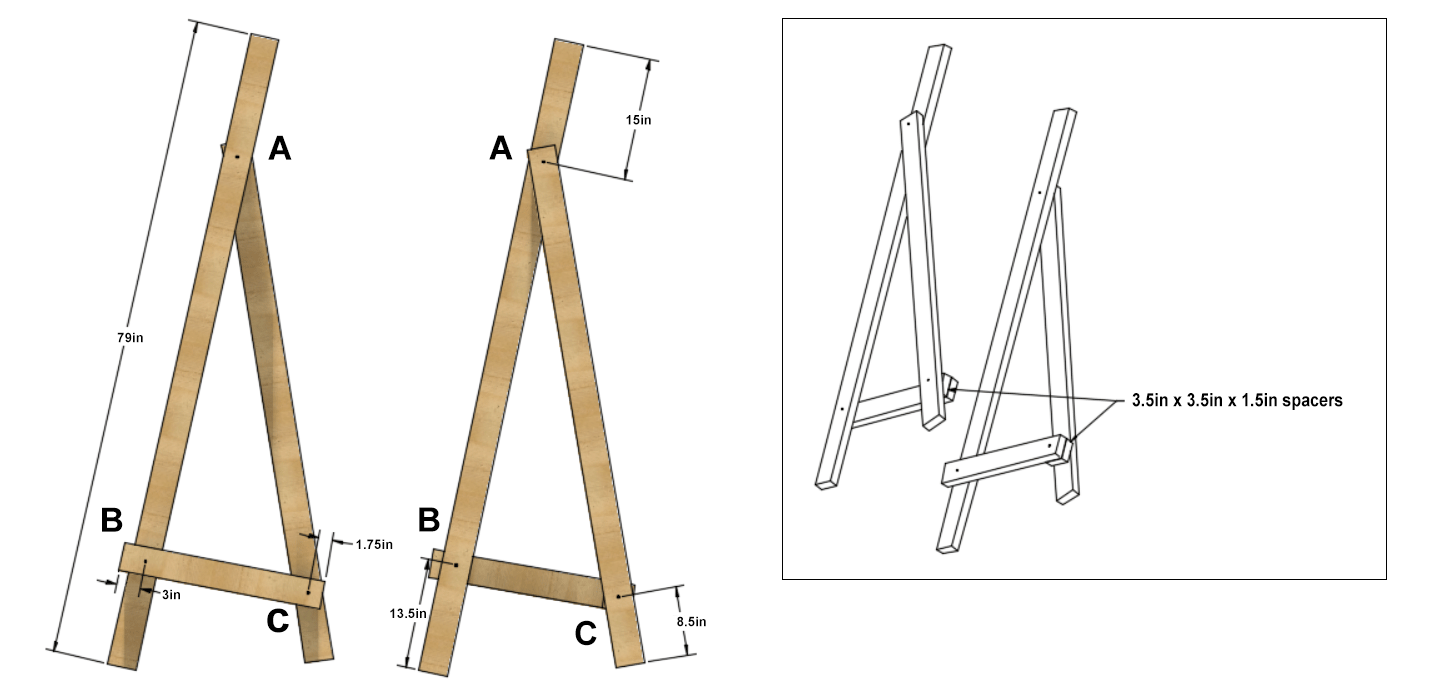
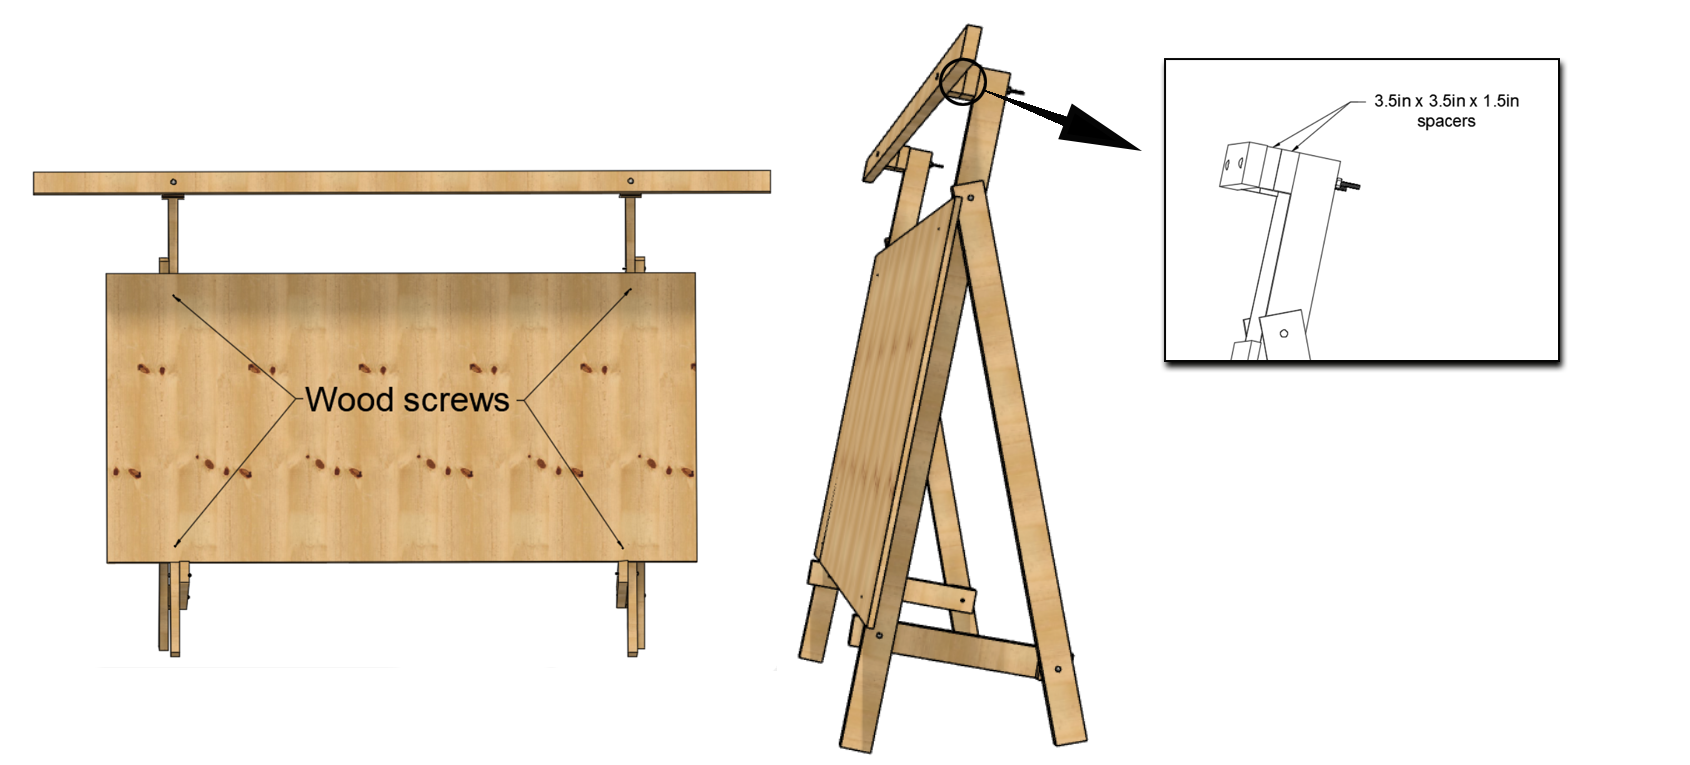
Final frame assembly
- Bolt the top beam to the legs using two 3/8 x 10in hex bolts.
- Use 4 wood screws to fix the spoil board to the frame.
Windows OS
- Download the New 2022 Ground Control version from HERE and save it to your computer.
- Extract the compressed .zip file and click on GroundControl_2022 to open it.
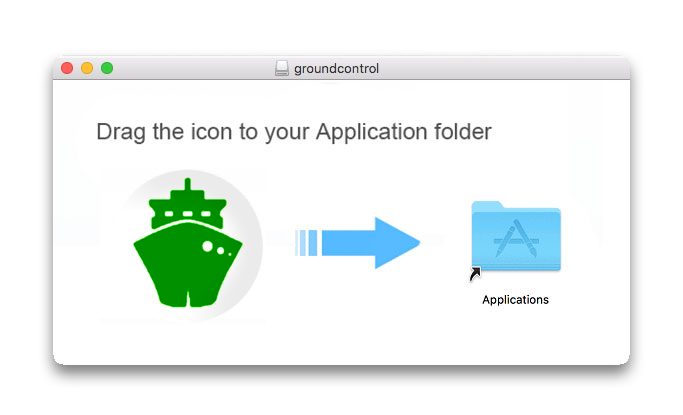
Mac OS
- Download the latest Mac version from HERE and save it to your computer.
- Double-click the DMG file, this will open the finder window, drag the application’s icon to your applications folder.
- Launch Ground Control 2022 by right clicking the icon in your applications folder and selecting [Open]
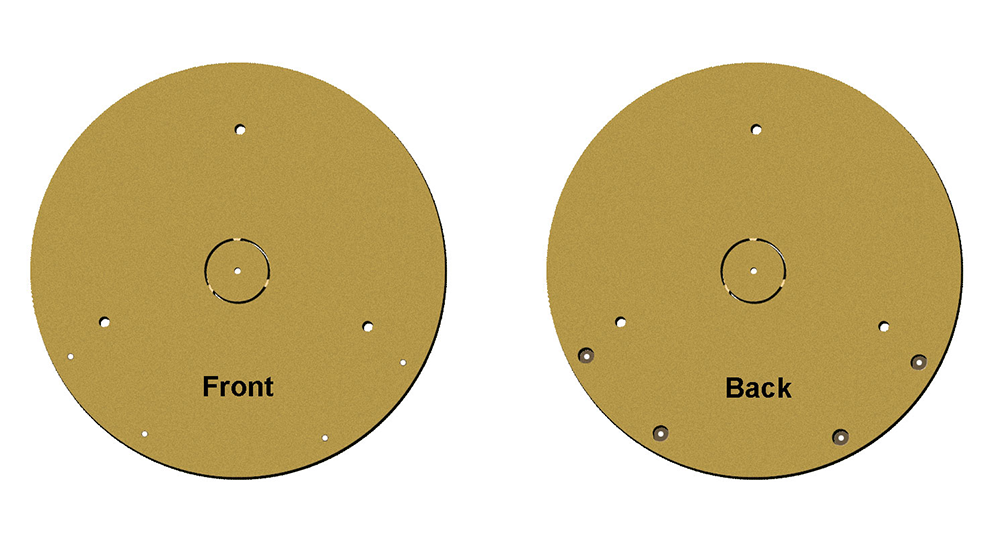
Making the sled
- Cut the following shapes from a sheet of plywood and drill the holes.
- You can use the router to route out the center hole. The dimensions of these parts are not critical, and you can cut them by hand, any leftover plywood with a similar area ( 18" x 18") will work just fine.
- We are going to use the Maslow itself to precisely cut the final sled later on.
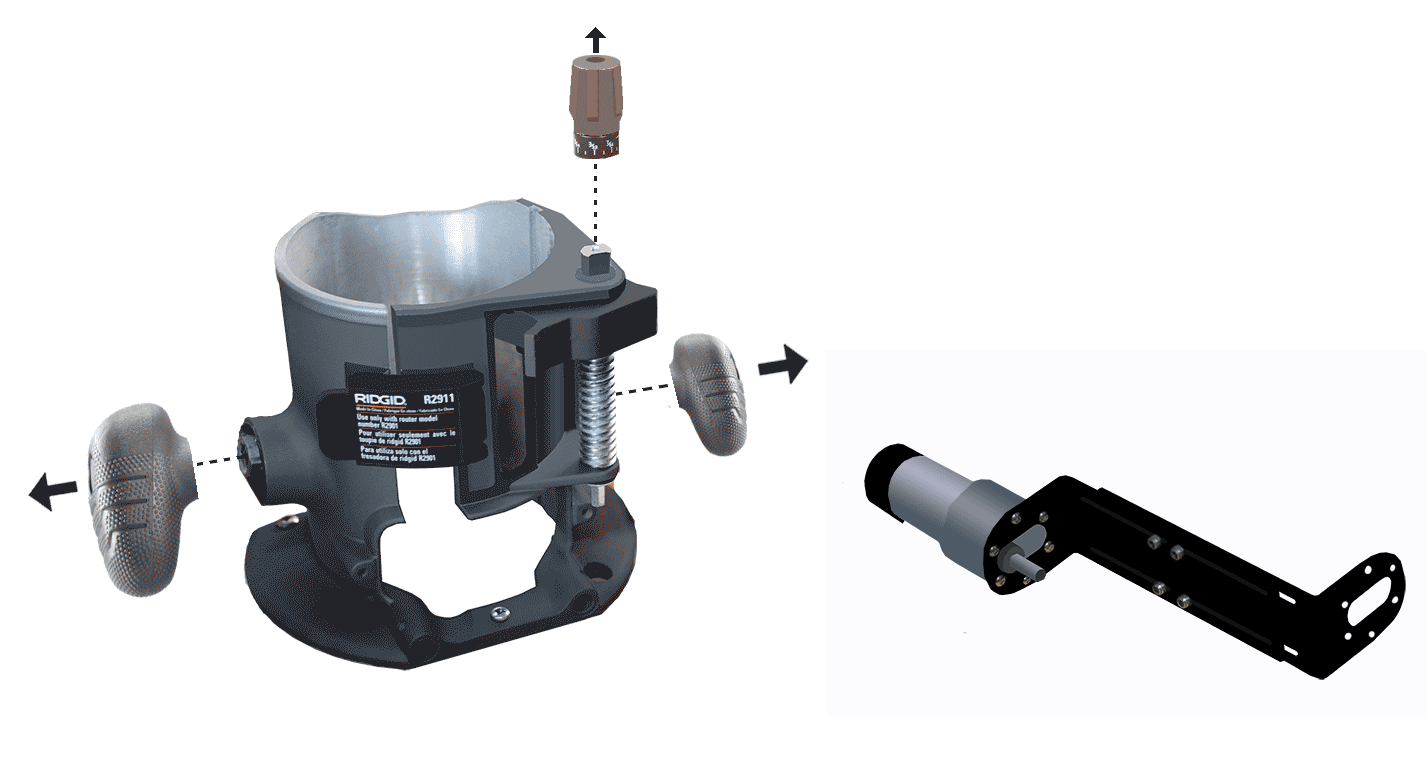
Router base and z-axis
- Remove the handles and z-axis knob from the router base.
- Assemble the z-axis motor and the L brackets as shown, do not tighten the bolts holding the two brackets together just yet.
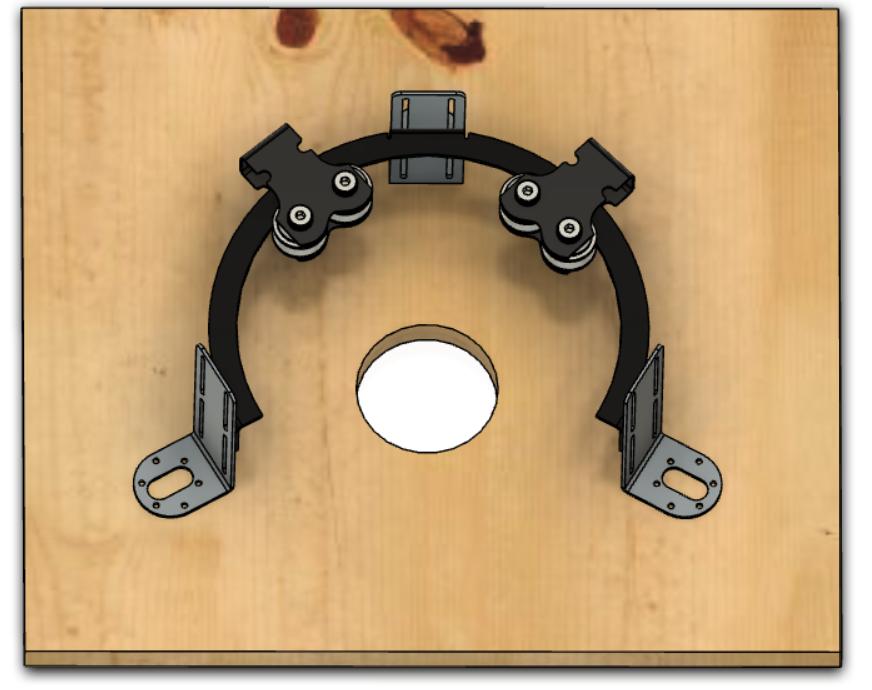
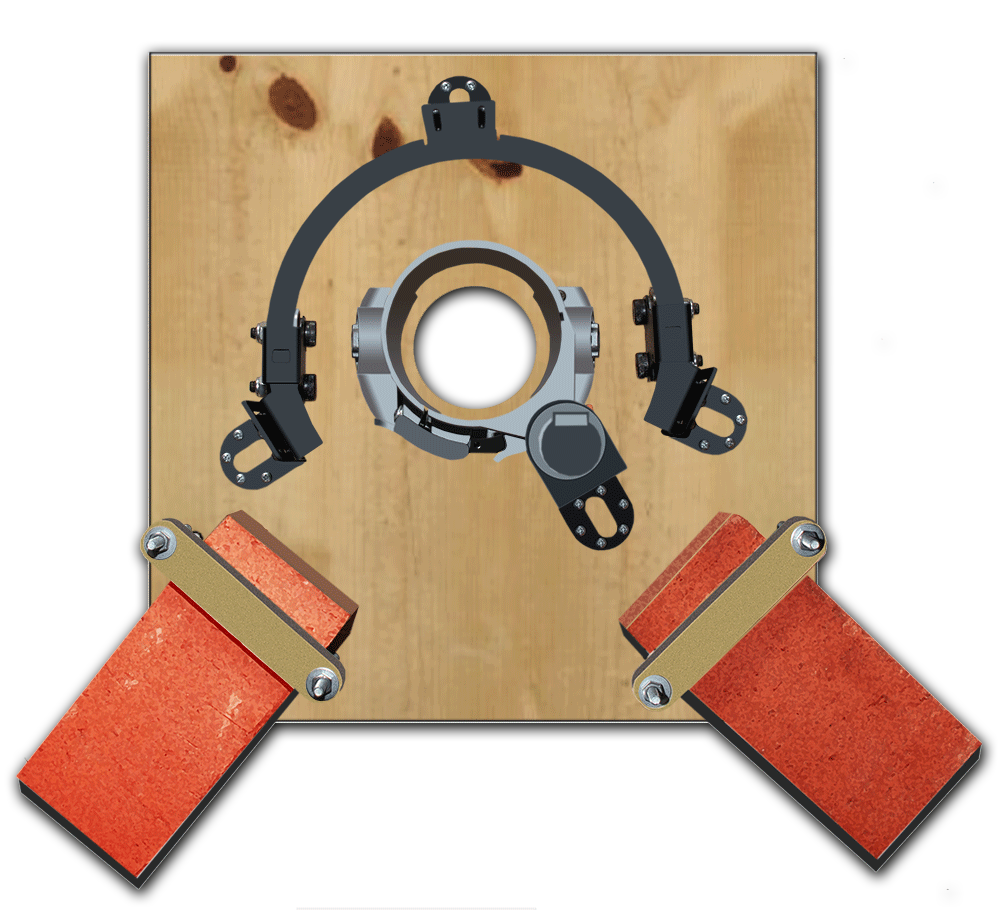
Mounting the ring and carriages
- Install as shown in the pictures below.
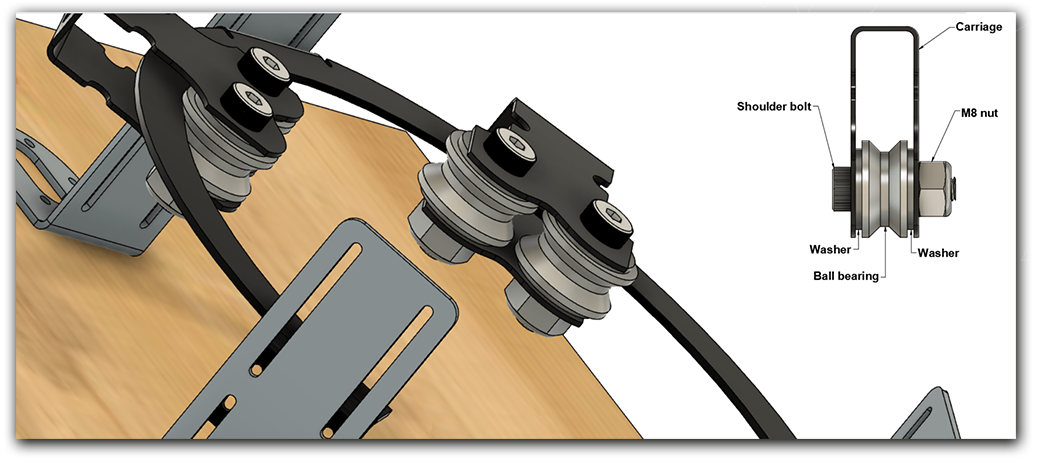
- Try to make the ring concentric around the center the best you can, on the final sled we will use alignment marks to dial the precise placement.
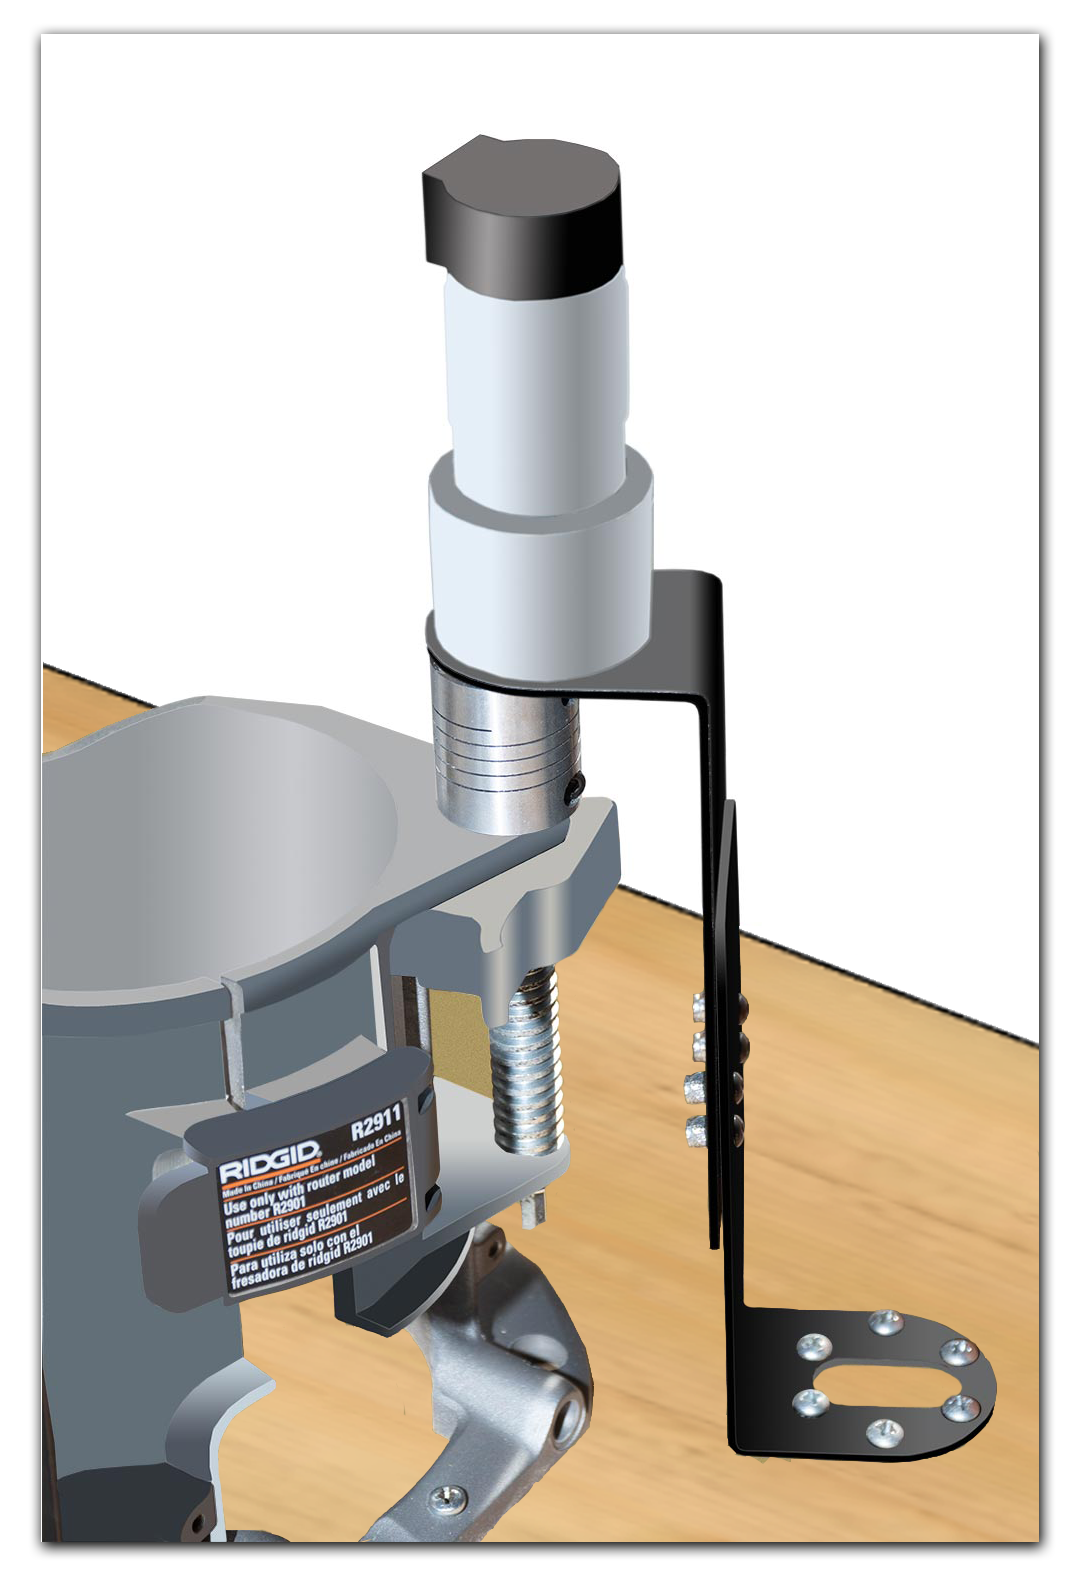
Mounting the router sleeve
- Fix the router base down onto the sled first, then install the z-axis motor as shown.
Mounting the motors
- Screw the brackets down as illustrated below (one on each end of the top beam) - use medium size screws (bag #4)
- Bolt the motors to the brackets (bag #6)
- Install the two sprockets using the included Allen wrench (bag #5)
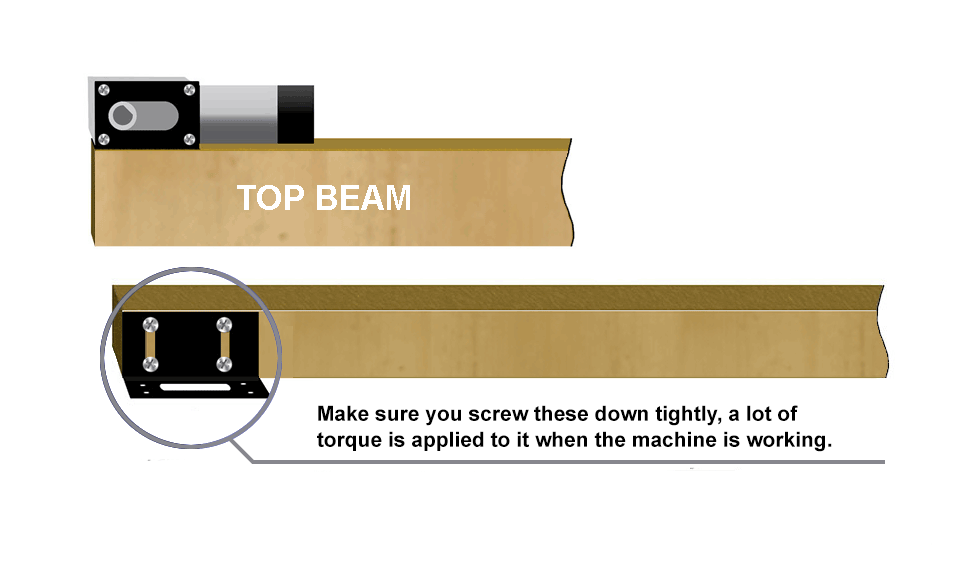
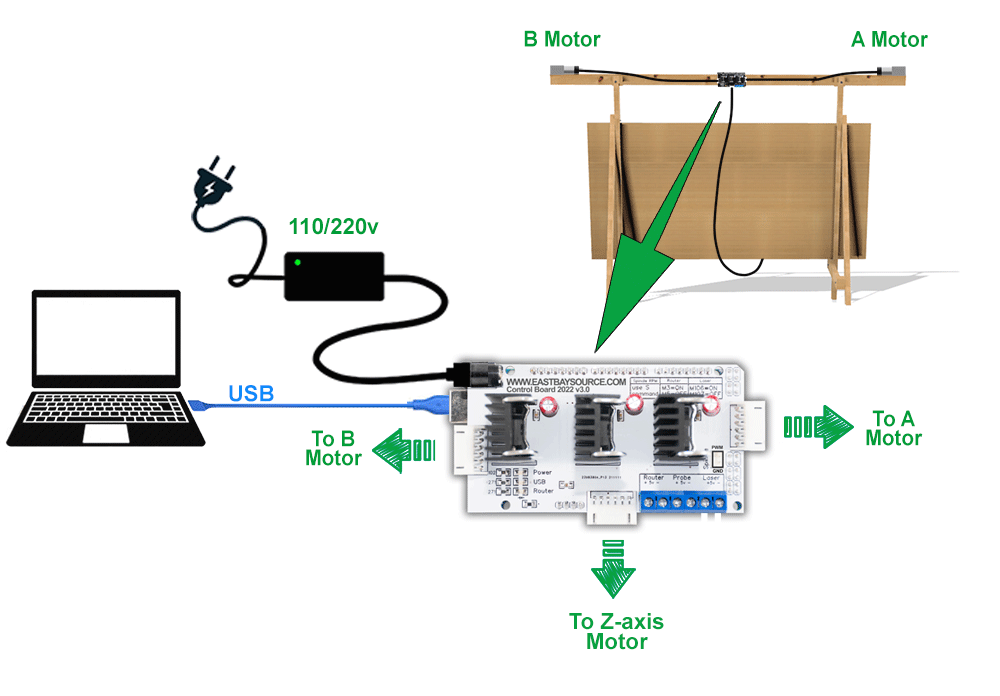
Installing the Control Board
- Attach the electronics to the back of the top beam using the screws and nylon spacers in bag #5
- Connect the motors to the controller as shown below
- NOTE: The control board's firmware comes pre-installed already (plug and play).
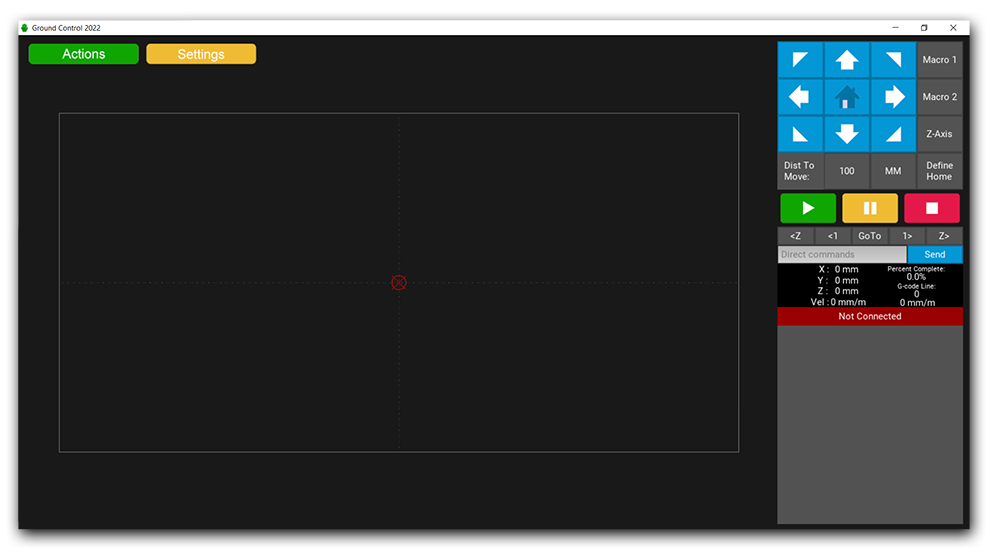
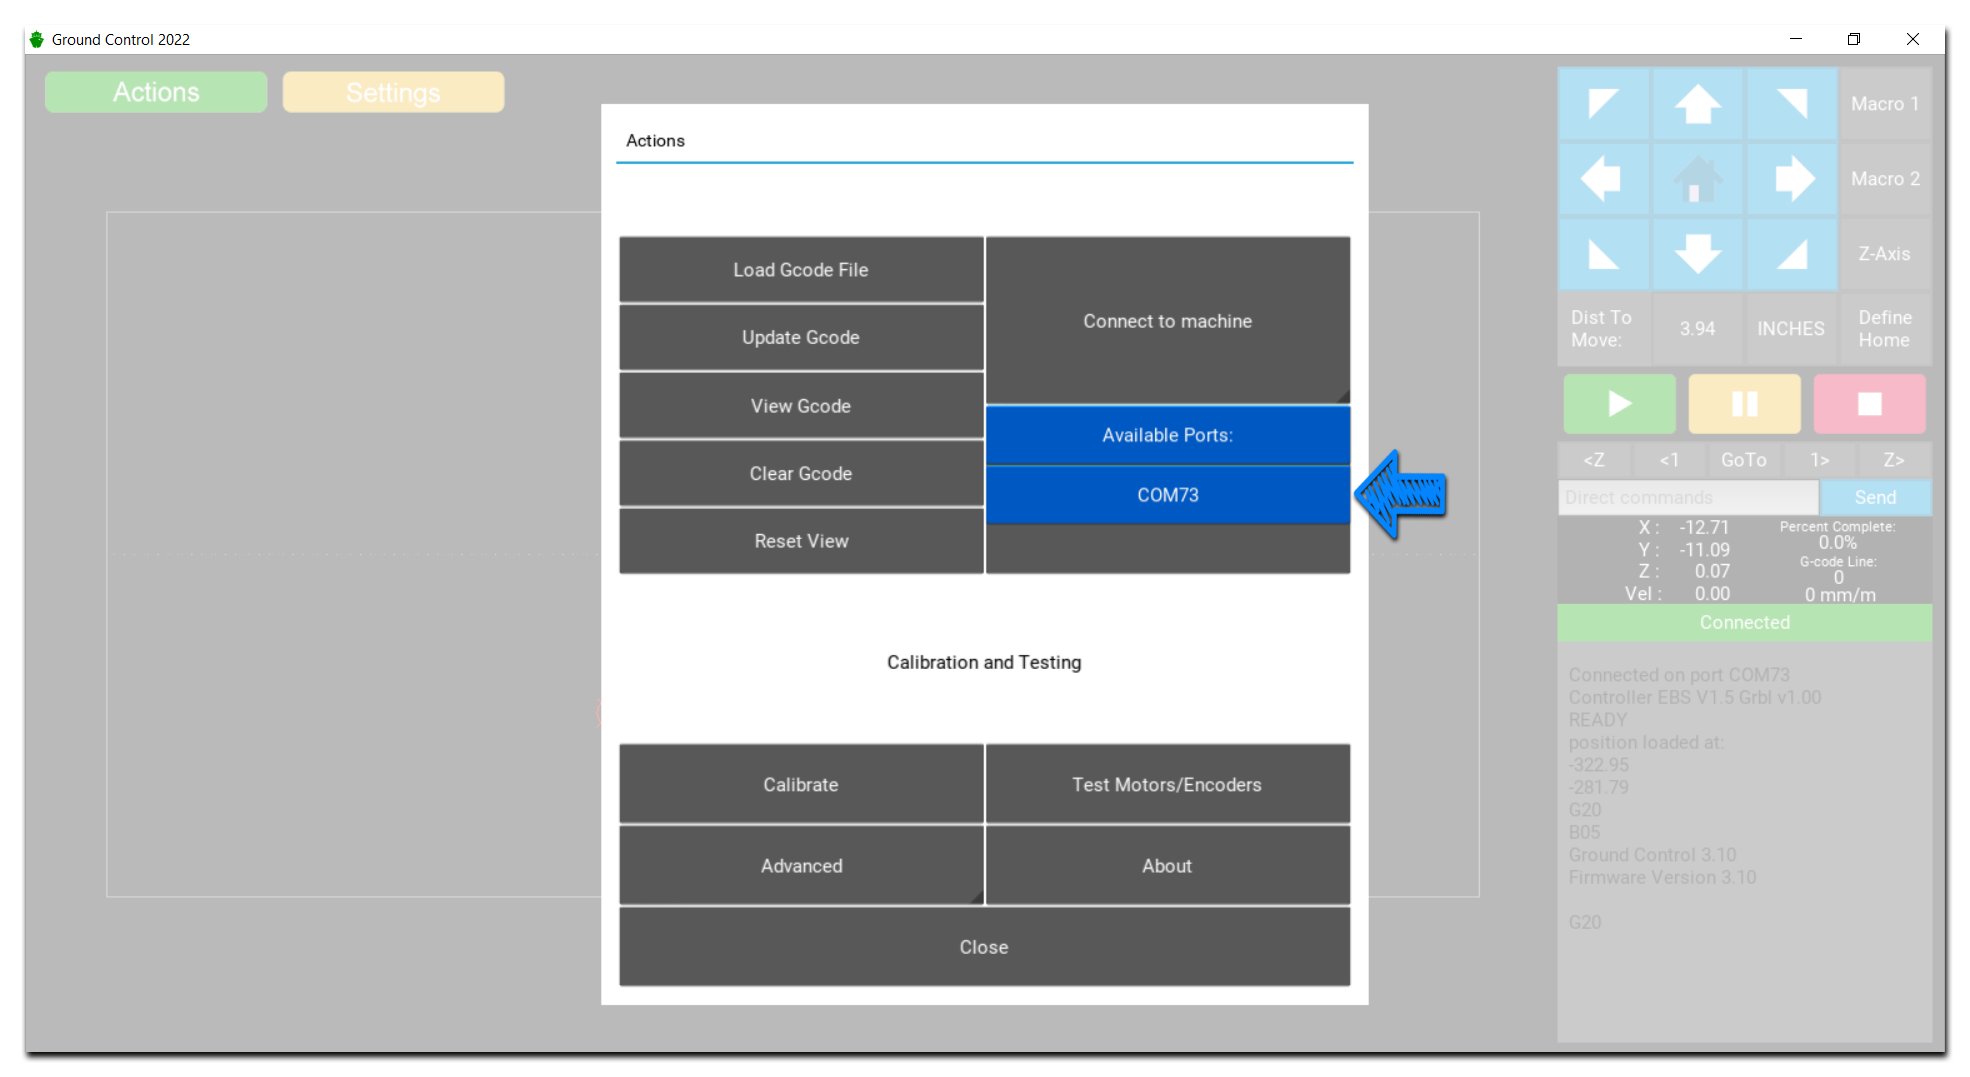
Connecting to the machine
- Open Ground Control and connect to the machine
- Click on -->
 -->
-->  and select the port from the list ->
Begin Calibration
- Click on --> -->
 --> [Begin]
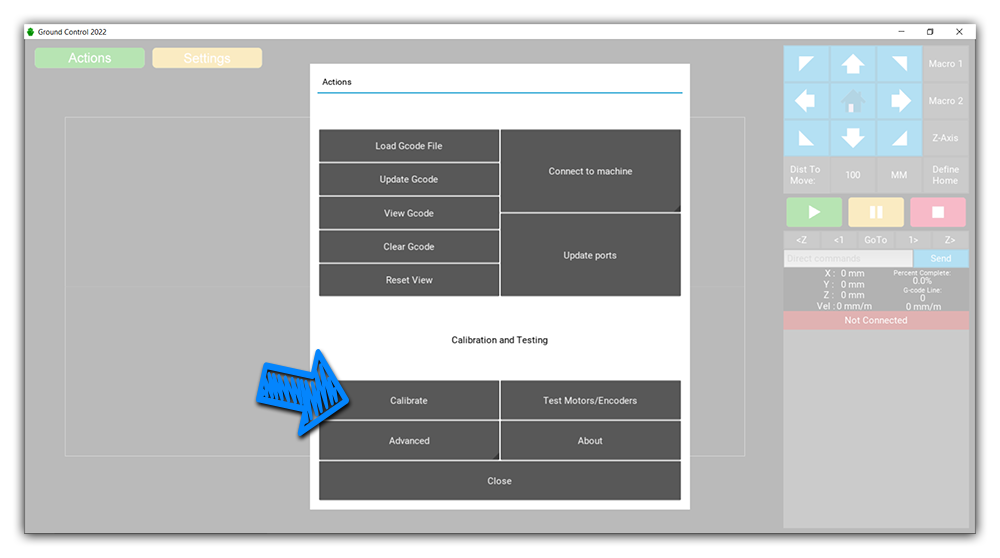
- Follow on-screen instructions

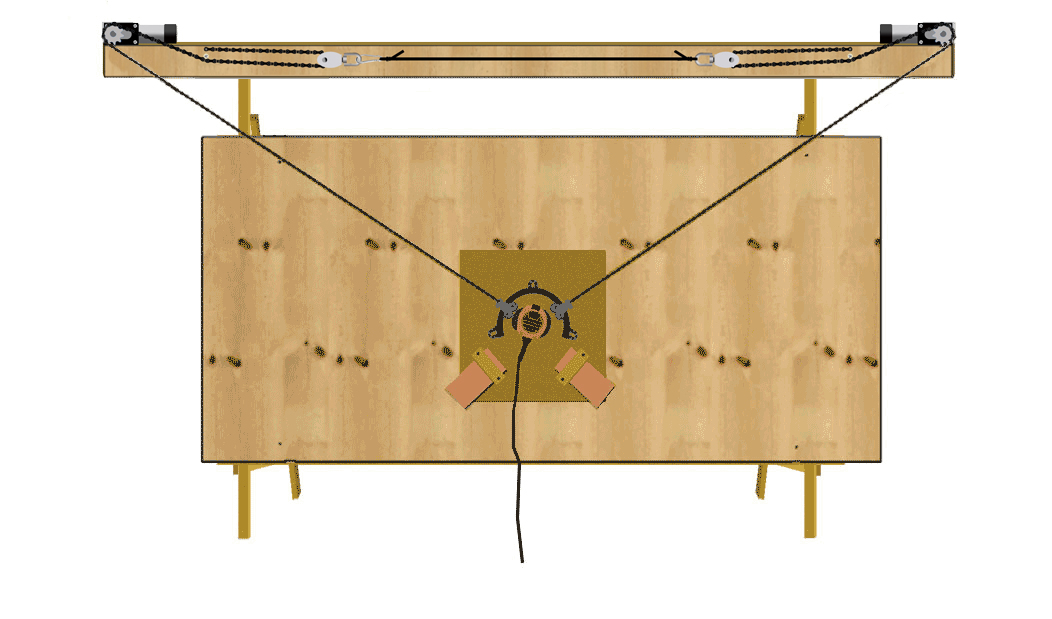
Reference Image
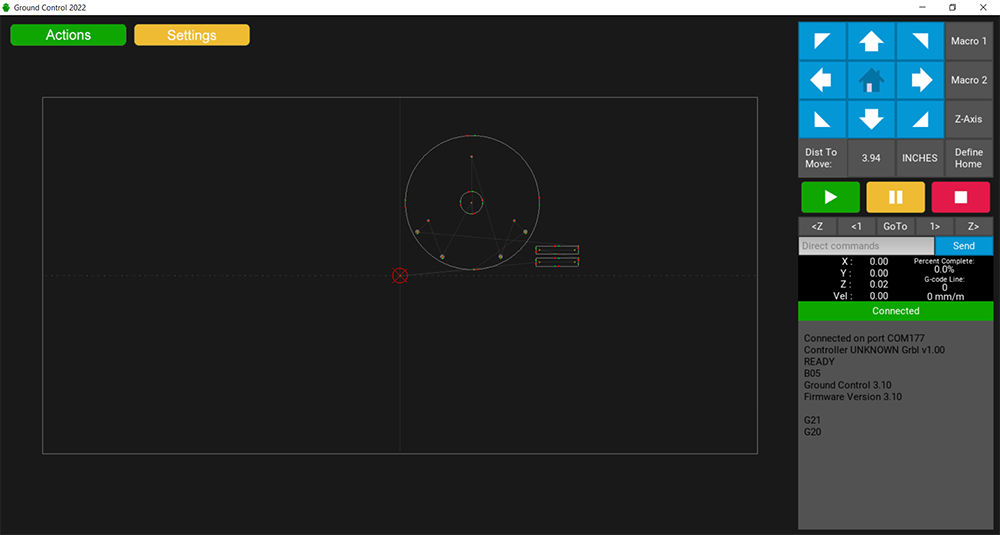
Done!
- Your machine is now calibrated and ready to cut.
- Please, go to the next final step.
Final Sled
- Download the sled file from HERE
- Go to --> -->
 --> and select final_sled.nc
 - Before start cutting, make sure it's positioned where you want it on the cutting area. To move it around, hover the mouse over the new position, click and hold the left button down until a menu appears, then select [Set Home]
- To start cutting, turn the router On and press

IMPORTANT - Make sure your computer has "Sleep settings" set to never while on power to avoid USB disconnections.
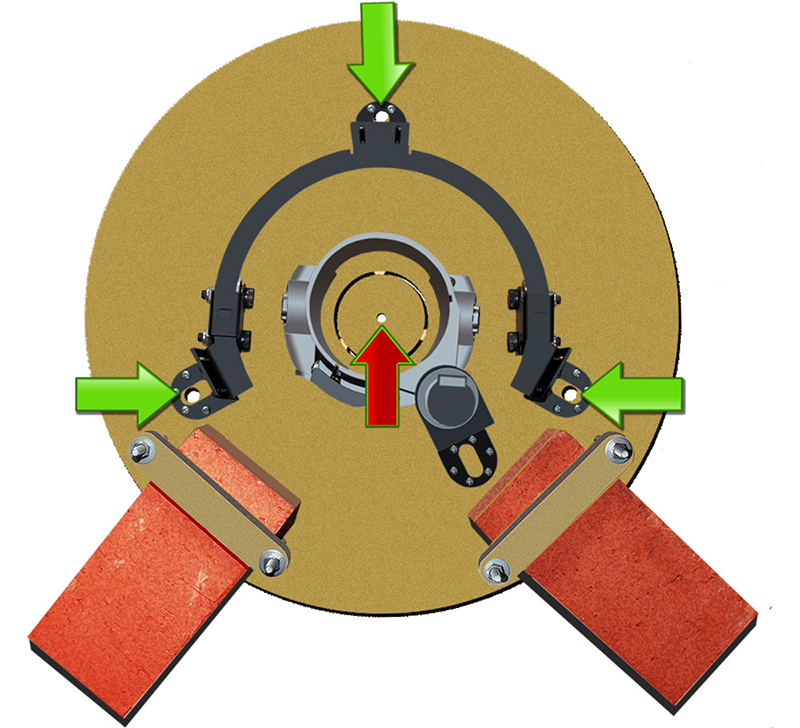
Remove it from the plywood and install the hardware
- Cut the holding tabs to remove it from the plywood.
- Do not cut the tabs holding the centerpiece just yet, you will need it to center the router and screw the base down.
- Leave the router bit you used to cut out this sled chucked up in your router.
- Place the router bit through the center hole (red arrow) to ensure a perfect alignment then screw the base down.
- Remove the router from its base and knock out the central puck which is held in place with thin tabs.
- Re-insert the router back into the base.
- Use the other bigger holes to align the ring (green arrows).
- Attach the bricks.
Bill of Materials
- (3) 2x4s 10 feet long
- (2) 2x4s 8 feet long
- (2) 4'x8' x 3/4" Plywood sheets.
- (2) Bricks
- (2) 3/8 in x 10 in hex bolts with with washers and nuts
- (2) 1/4 in x 5 in carriage bolts with with washers and nuts
- (4) 1/4 in x 3.5 in carriage bolts with washers and nuts
International users. 2x4 (two by four) is a common reference for wooden boards in the US. However, 2x4 is nominal size, the actual measurements are 1.5 in x 3.5 in.
Cutting and drilling the holes
- Cut (2) 10-feet and (2) 8-feet long boards as illustrated below
- Use 1/4" drill bit for the holes
All measurements are in inches and referenced from the end of the parts to the center of the hole.
- Take the uncut 10ft board and drill two 3/8 holes as illustrated below.
- Drill two more 3/8" holes in the two 79in boards (previously cut and drilled) as illustrated below.
Bolt together the legs
- Use (2) 1/4in x 5in carriage bolts for joint C
- Use (4) 1/4in x 3.5in carriage bolts for joint A & B
Final frame assembly
- Bolt the top beam to the legs using two 3/8 x 10in hex bolts.
- Use 4 wood screws to fix the spoil board to the frame.
