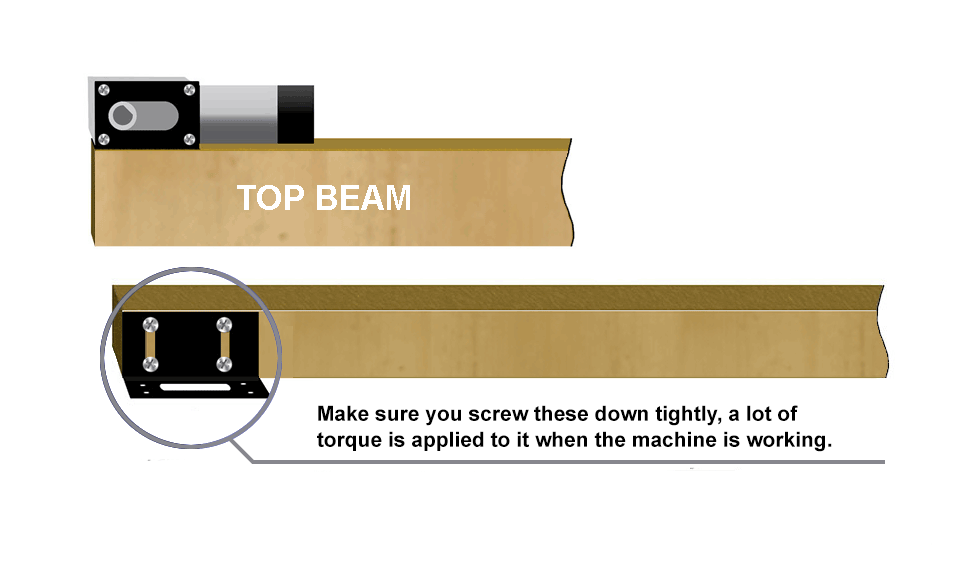
Mounting the motors
- Screw the brackets down as illustrated below (one on each end of the top beam) - use medium size screws (bag #4)
- Bolt the motors to the brackets (bag #6)
- Install the two sprockets using the included Allen wrench (bag #5)
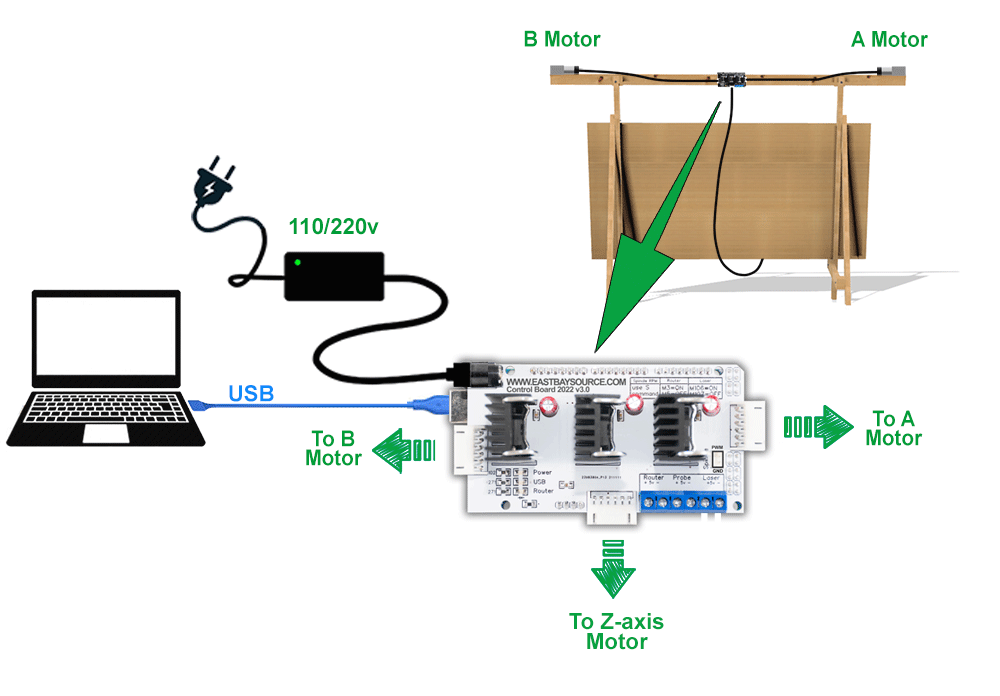
Installing the Control Board
- Attach the electronics to the back of the top beam using the screws and nylon spacers in bag #5
- Connect the motors to the controller as shown below
- NOTE: The control board's firmware comes pre-installed already (plug and play).
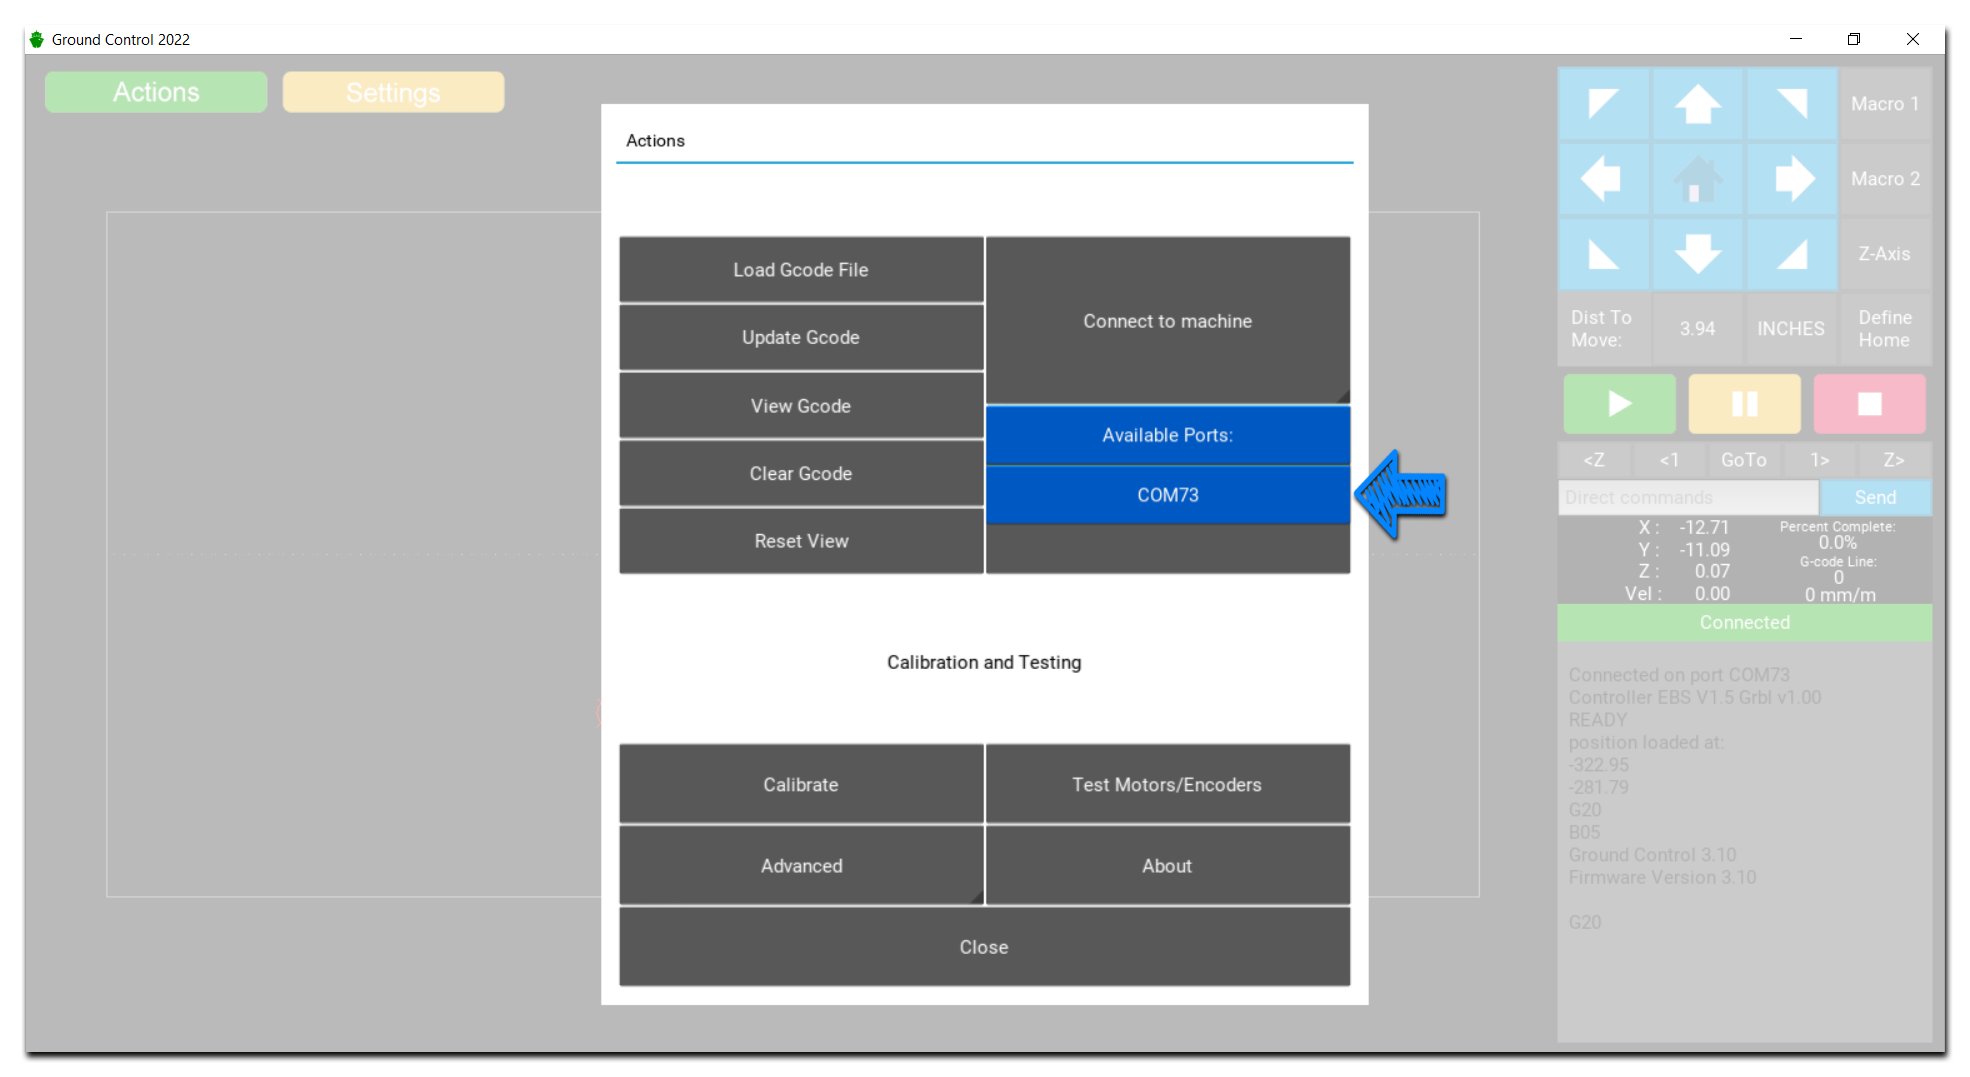
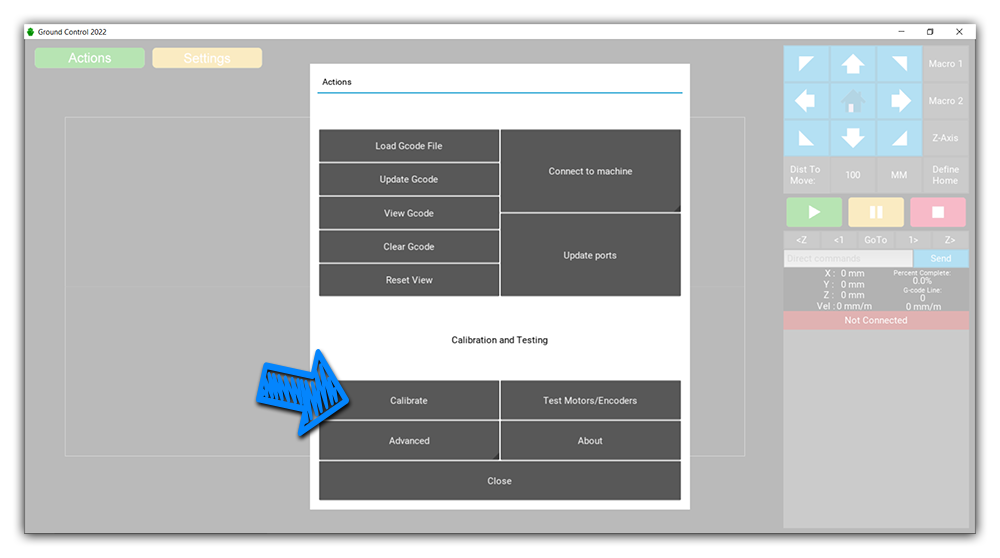
Connecting to the machine
- Open Ground Control and connect to the machine
- Click on -->
 -->
-->  and select the port from the list ->
Begin Calibration
- Click on --> -->
 --> [Begin]
- Follow on-screen instructions

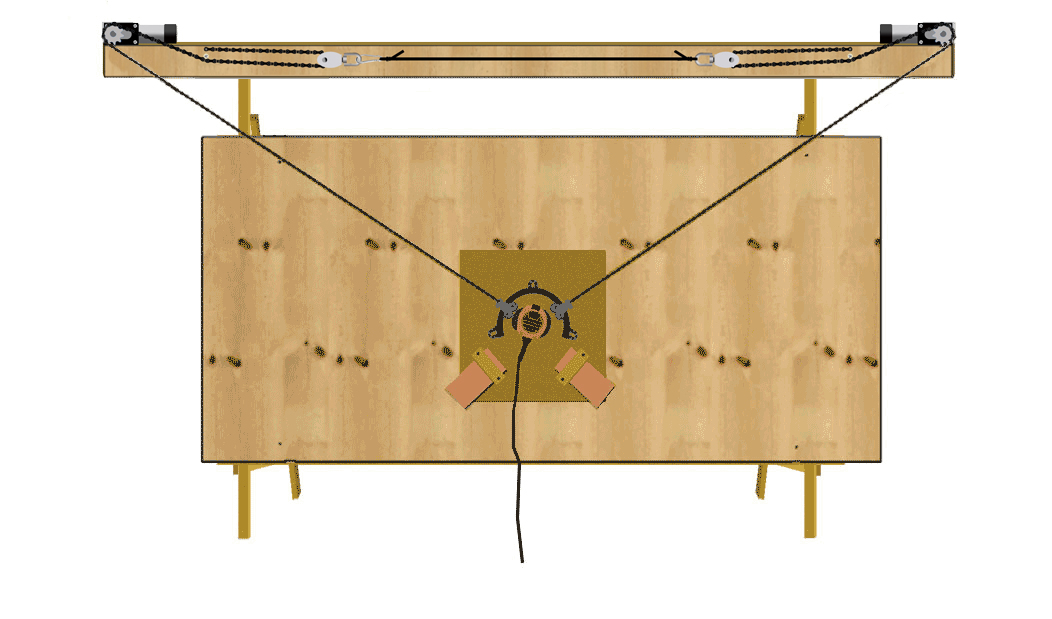
Reference Image
Done!
- Your machine is now calibrated and ready to cut.
- Please, go to the next final step.
