Making the sled
- Cut the following shapes from a sheet of plywood and drill the holes.
- You can use the router to route out the center hole. The dimensions of these parts are not critical, and you can cut them by hand, any leftover plywood with a similar area ( 18" x 18") will work just fine.
- We are going to use the Maslow itself to precisely cut the final sled later on.
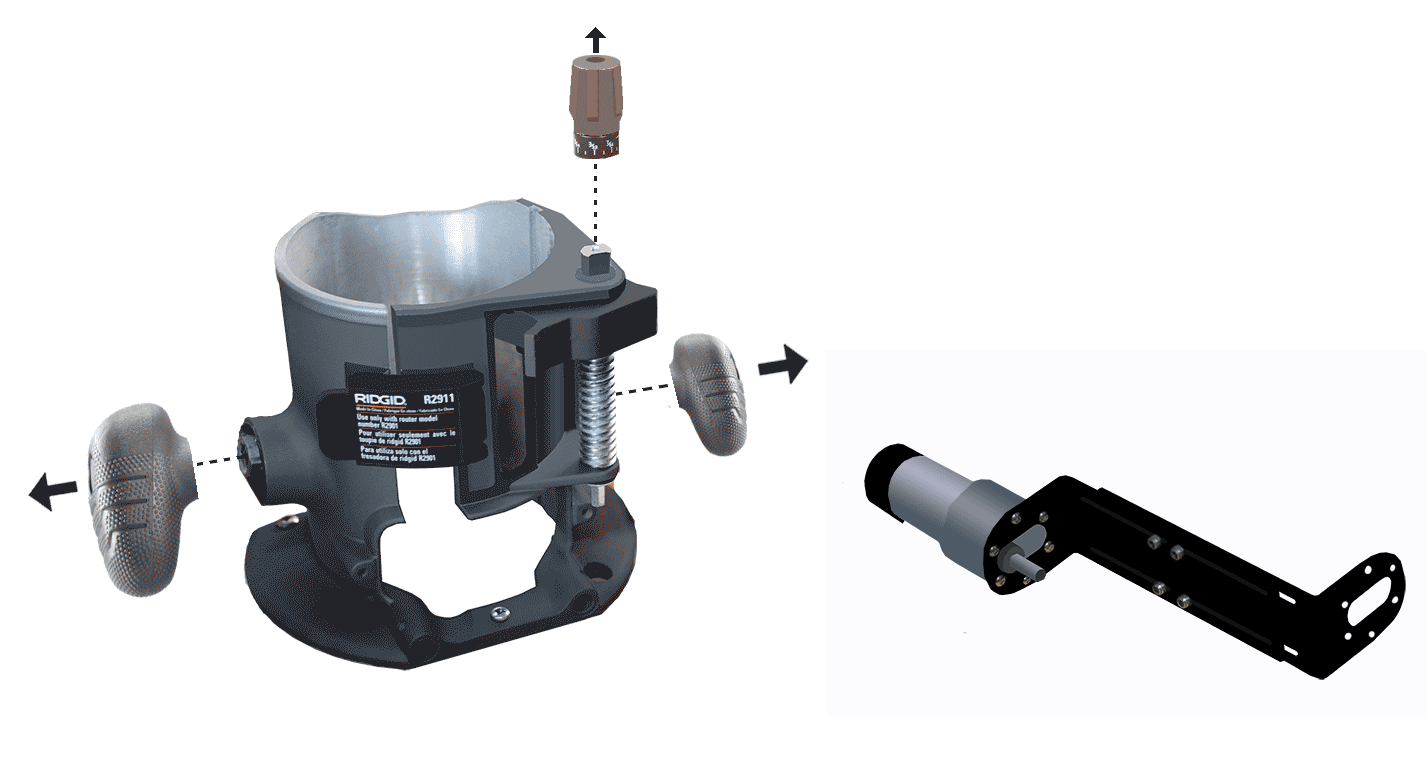
Router base and z-axis
- Remove the handles and z-axis knob from the router base.
- Assemble the z-axis motor and the L brackets as shown, do not tighten the bolts holding the two brackets together just yet.
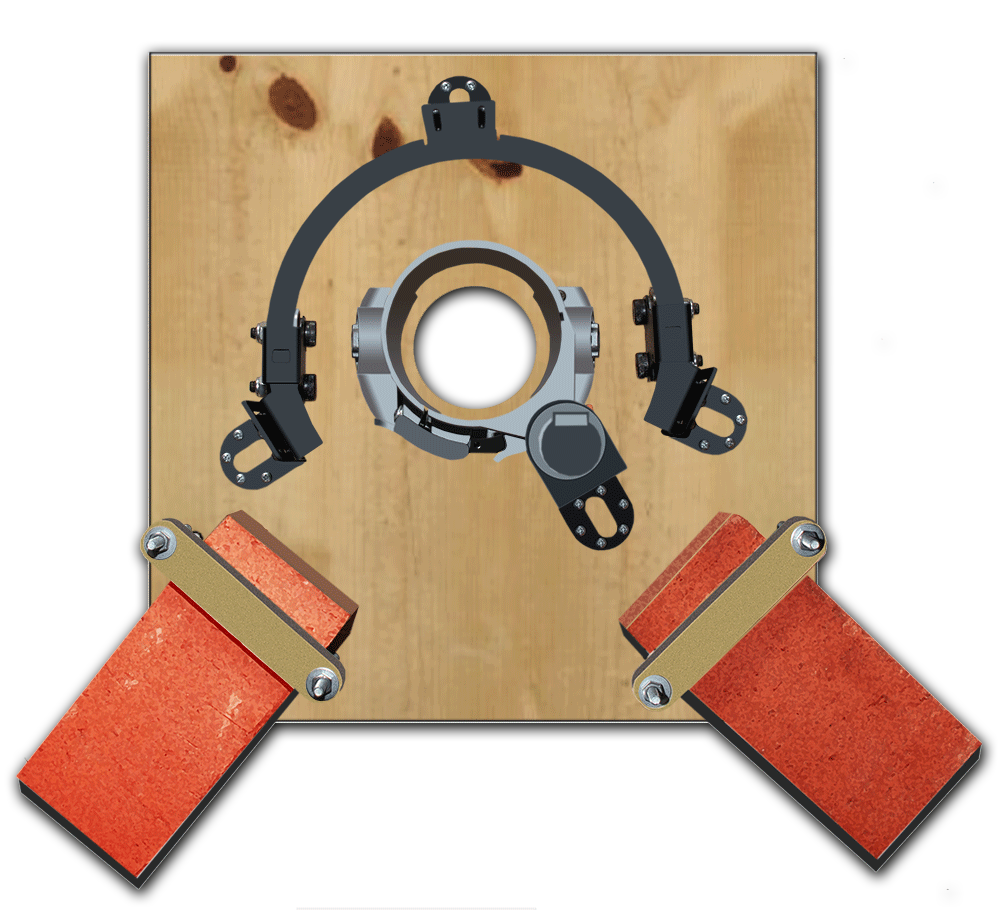
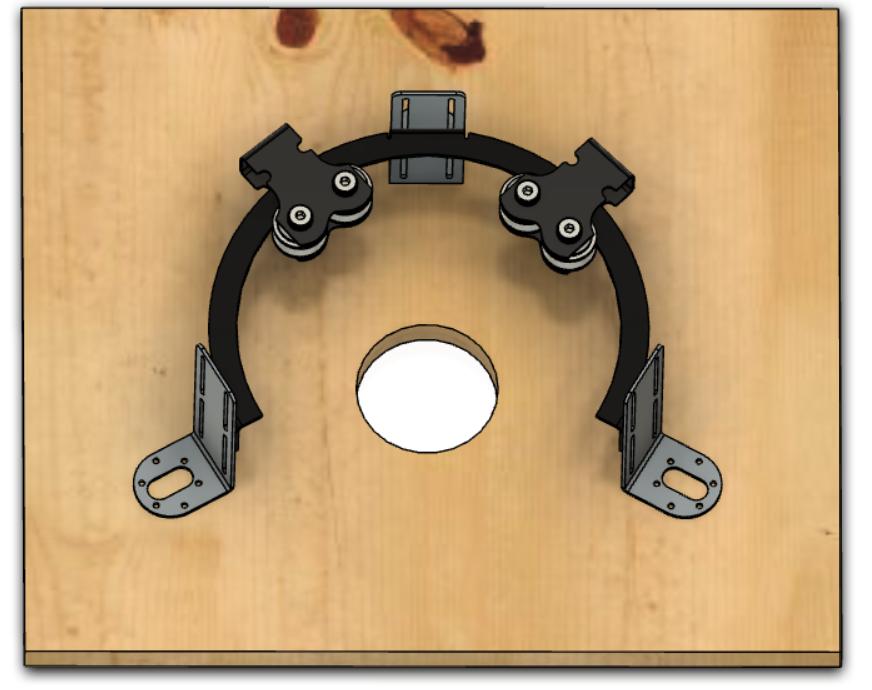
Mounting the ring and carriages
- Install as shown in the pictures below.
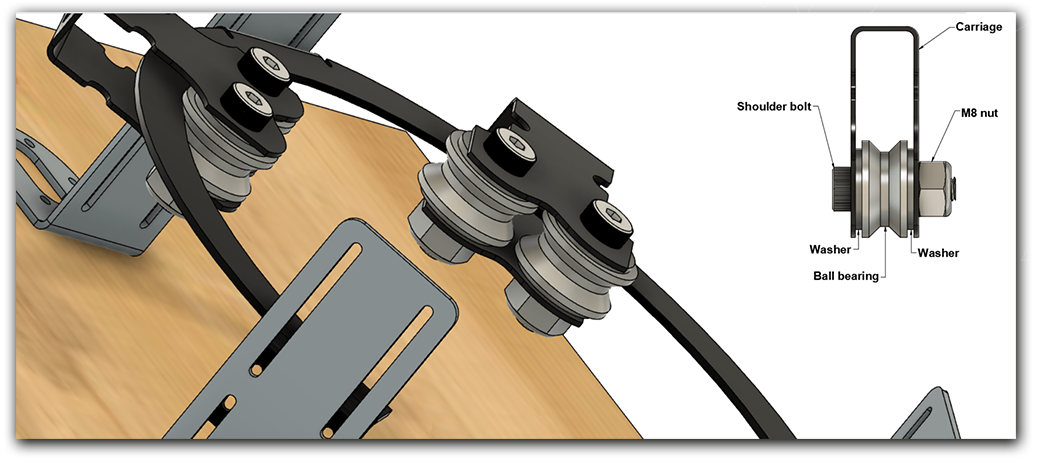
- Try to make the ring concentric around the center the best you can, on the final sled we will use alignment marks to dial the precise placement.
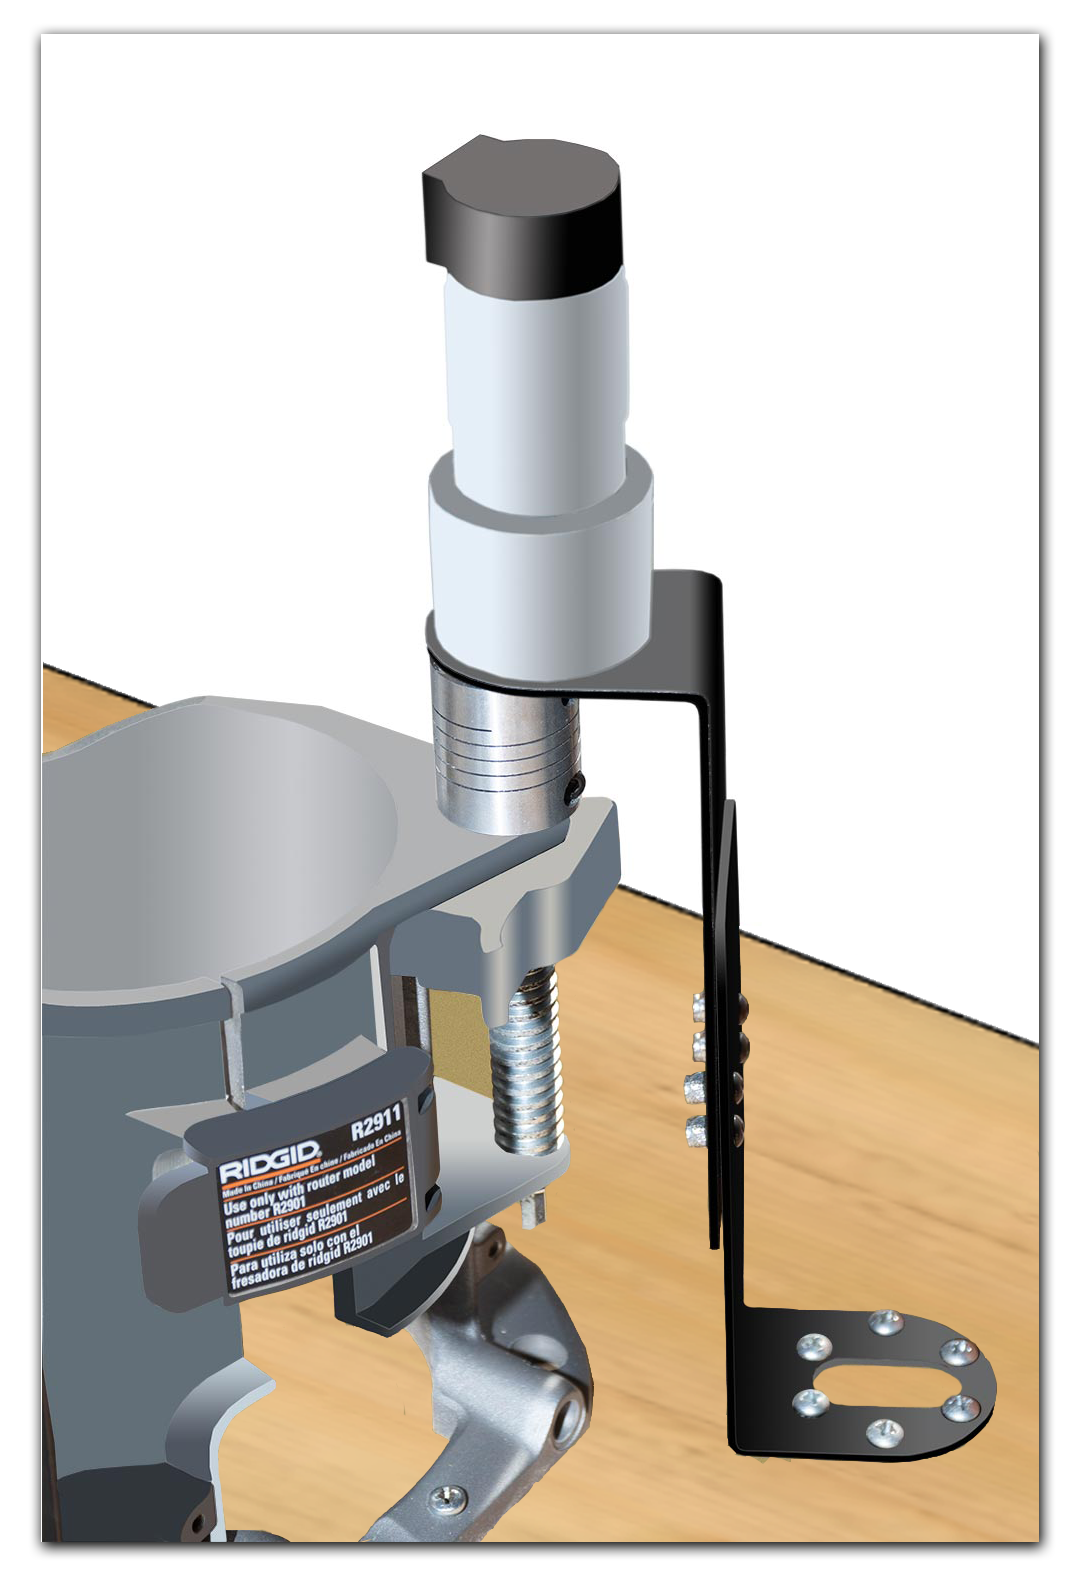
Mounting the router sleeve
- Fix the router base down onto the sled first, then install the z-axis motor as shown.